
Is It Worth It To Epoxy a Garage Floor – 4 Pros & Cons
Is it worth it to epoxy a garage floor? This article covers the pros, cons, costs, and everything you need to start.
Product Pros
Product Cons
Cost – $0.74 per square foot plus any tools you may need if you do it yourself or between $3 to $12 if you hire a professional company to do this for you. So is it worth it to epoxy a garage floor?
An epoxy-coated garage floor will give an aesthetically pleasing look, prevent cracks and staining, and make it easier to clean up messes. However, epoxy can give off a lot of fumes when applied, and the floor must be spotless before applying.
Keep reading to learn more about the cost, pros and cons, and the process.
What is the Average Cost to Epoxy a Garage Floor
The average cost to epoxy a garage floor depends on how you do it (DIY or Hire Professionals), the conditions of the current floor, and how ample the space is overall.
Overall, depending on whether you do this, epoxying your garage floor will cost between $1 to $12 a square foot. In this section, I will summarize all 3 of these areas for you.
DIY or Hiring Professionals – Which is Better
Before you start this project, you need to consider if you want to tackle this project on your own or hire a professional to do this for you.
A professional will cost more, but they have the added benefit of knowing what they are doing versus you, who may or may not have done this before. They have the right tools for the job and know how to get the best results.
If you plan to do this yourself, you’ll be able to save a lot of money, and if you’re well-versed in DIY projects like this, you shouldn’t have a problem. If you’ve never done something like this, don’t be misled that this is easy.
This project will take at least 2 to 4 days and require much patience and time. If these are not skills you have, consider getting a quote from a few companies to see how much it will cost.
Floor Condition
Next, if the floor is not in perfect condition, you will spend a lot of time cleaning, scrubbing, and patching to get the floor to a place where you can apply the epoxy.
This will likely take the majority of the time to complete the job. If your floor has a previous coating, remove it by grinding it off or applying a special primer to help cover it up.
As a result, this could add more to the cost in this situation. If the floor is clean, it will save you time and cost.
Floor Size
Finally, the size of your garage will also factor into this cost. If you have a one-car garage, the cost will be cheaper than a 2.5-car garage.
Below are some general costs for a one-car to a three-car garage.
| Average Cost to Epoxy | DIY | Pro |
| 1 car garage 250 sq. ft | $250 to $750 | $1000 to $3000 |
| 2 car garage 500 sq ft. | $500 to $1500 | $2000 to $6000 |
| 2.5 car garage 750 sq ft. | $750 to $3000 | $3000 to $9000 |
| 3 car garage 1000 sq ft. | $1000 to $3000 | $4000 to $12,000 |
What Are the Advantages & Disadvantages of Epoxy Flooring
If you’re unsure if putting epoxy on your garage floor is right, here are a few things to consider.
Advantages
Great Looking Floor. Whether you plan to keep a particular car in your garage or want to use the space for parties and family get-togethers, it will make your garage floor shine.
Prevents Staining. Next, water and oil on your floor will not match the epoxy. It will prevent staining on the floor since it will fill in the pores of the concrete.
Easy Clean-Up. As a result, this will also make floor clean-ups a lot easier. No more oil dry; sweeping will be much easier since the dirt cannot engrain itself to the floor.
Resist Floor Cracking. Finally, the epoxy will coat the floor and help prevent cracking and chipping. This is because the epoxy will harden the floor.
Disadvantages
Fumes. Epoxy will have a lot of solid fumes when you first put it down, and you will want a well-ventilated area. Try to do it on a nice day out where you can keep the garage door open to keep a breeze going to keep the fumes from building up.
The floor Must Be Clean. Before laying the epoxy down, you want the floor as clean as possible. You must follow an exact process to do this, but the epoxy won’t adhere as well if you don’t.
Epoxy Can Be Expensive. Epoxy itself can cost upward of $100 per gallon or more. This doesn’t even include the cleaners and clear coats. At the end of this article, I can show where to buy epoxy and get the best deal.
Doesn’t Last Forever. Finally, just because you put epoxy on your garage floor doesn’t mean it will last forever. High-traffic areas will show wear and tear and need continued maintenance.
How Long Does Epoxy Last On Your Garage Floor
The time the epoxy will last depends on three significant factors: how clean the floor was before it was applied, the elements floor is in regularly, and if the floor receives any continued maintenance.
How Clean Was the Floor? If you just swept the floor and washed it out with a garden hose, you didn’t get it near clean enough. You must also remove loose debris, use cleaning solutions, and etch the floor for a better bond.
Conditions of the Floor. Next, what elements are the floor in regularly? Does it get much foot traffic, rain, snow, or road salt? These things will break down the epoxy over time and cause wear off.
Continued Maintenance. Finally, to keep your floor looking nice, you will need to do some essential maintenance, from washing it regularly to applying a fresh, clear coat on top to keep it looking nice.
If you follow these 3 points, the epoxy floor can last as long as you want, but if you don’t do any of these, the lifespan of the epoxy won’t be as long.
What Is the Process of Epoxy a Garage Floor
Now that you know the pros, cons, and costs, you might wonder what the process is like to epoxy your garage floor.
1. Check for Moisture
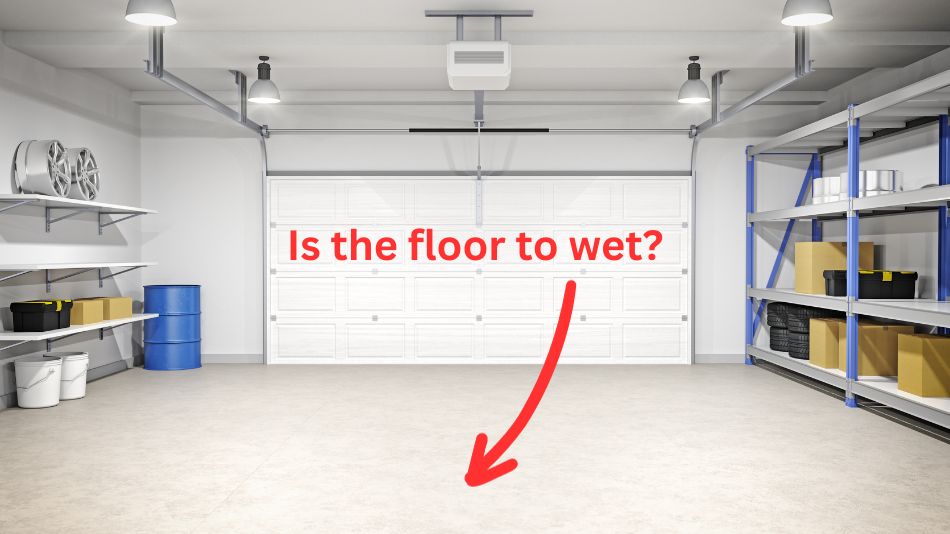
First, you must check to ensure no moisture on your garage floor. Sometimes moisture isn’t visible on the floor’s surface, so before you start, you need to do a simple test to see if you have moisture in your garage floor.
To do this, tape a small patch of plastic sheeting or vapor barrier to the garage floor. Then leave it for 24 hours. After that, peel up the plastic. If there is any moisture, apply a concrete moisture sealant like Rust-Oleum Concrete Moisture Stop Fortifying Sealer.
You will apply the sealer once you’ve cleaned the garage floor in Step 2.
2. Clean the Garage
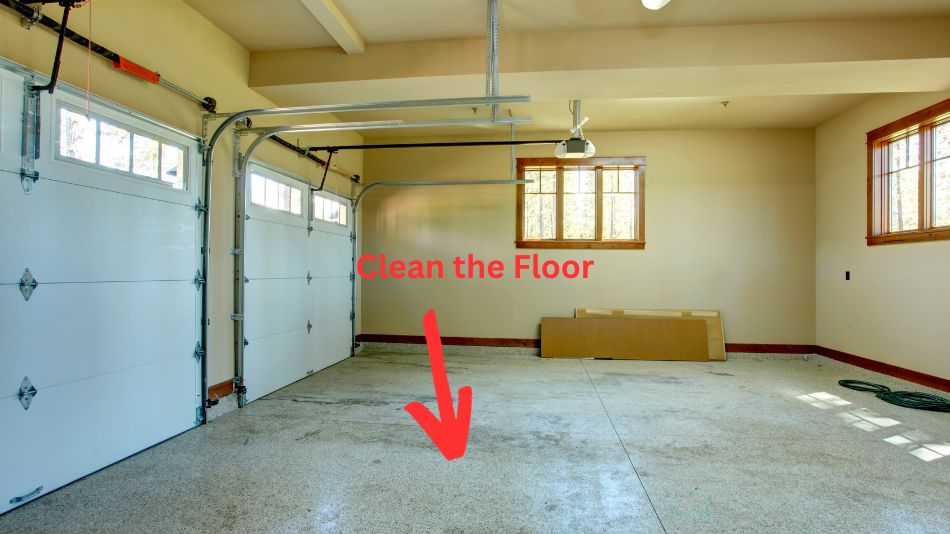
Next, you must clean out your garage to get the floor ready.
- Start by removing everything from your garage. Remember this will take roughly 2 to 4 days to complete.
- Once everything is removed, sweep out the garage to get all the large debris and dust.
- Use a wire brush to remove any grease and dirt stains.
- Next, use the Rust-Oleum Cleaner and Degreaser by mixing 1 gallon of the cleaner with 1 gallon of water.
- Pour the solution into small areas of the floor and work it in with a brush. Do this until the floor is completely done.
- Then, wash it with a garden hose and use a long-handled squeegee to remove the remaining water.
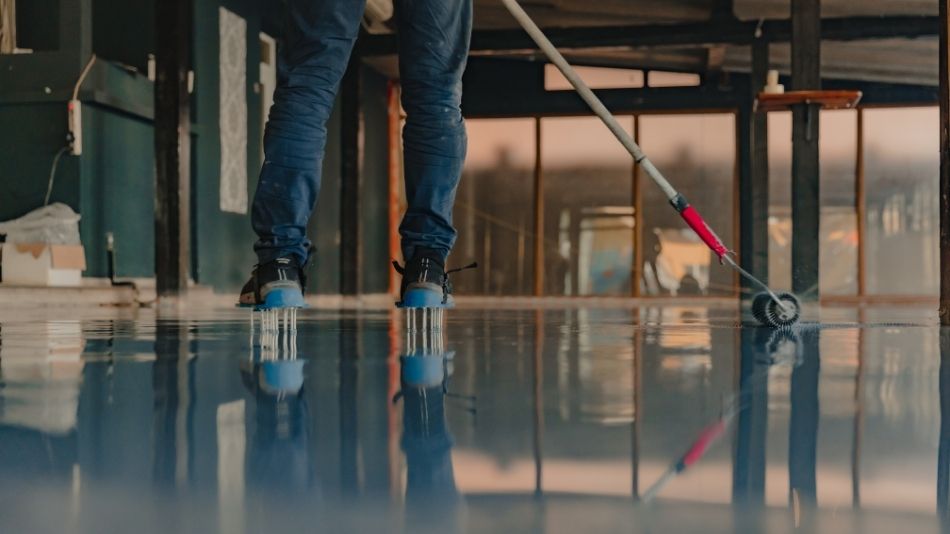
3. Etch the Floor
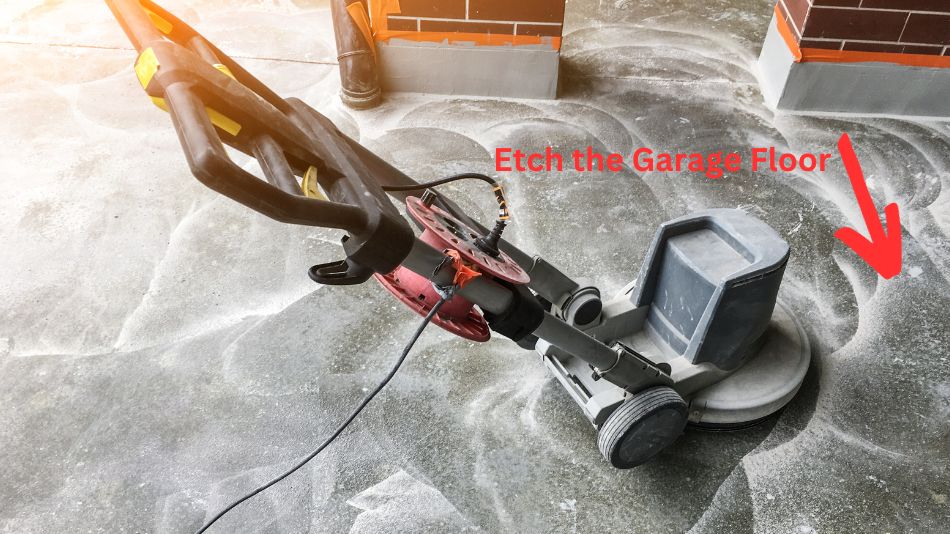
Next, get the etching powder out of the epoxy floor kit. Mix with 2 gallons of water. Also, make sure the floor is just wet before you start pouring the etching solution. The floor will need to stay this way for the entirety of the etching process.
Pour the solution into 10-foot by 10-foot areas and work it in with a scrub brush. Then, rinse the area before doing the next section. Repeat this until the floor has been completely done.
Finally, rinse the entire one more time to get the remaining solution off the floor and squeegee any remaining water off the floor. Then let it dry for 24 hours.
4. Patch & Repair Concrete

Once the floor is clean, you must patch and repair any cracks and holes. This will also help give your garage a smooth floor.
I recommend using Rust-Oleum Concrete Patch. You may also need a putty knife and an old piece of cardboard to help you mix the solution.
Side Note: Once these two solutions are mixed, you will have a limited time to use them before it starts to harden, depending on the air temperature. So make sure you do this all at one time. Drys in roughly 8 hours.
If you have a previous floor coating, you may want to apply a primer coat before applying the epoxy coat.
To do this, use the Rock Solid RUST-OLEUM Concentrate Floor Primer before applying the epoxy. You will want to let this dry for 12 hours before moving on.
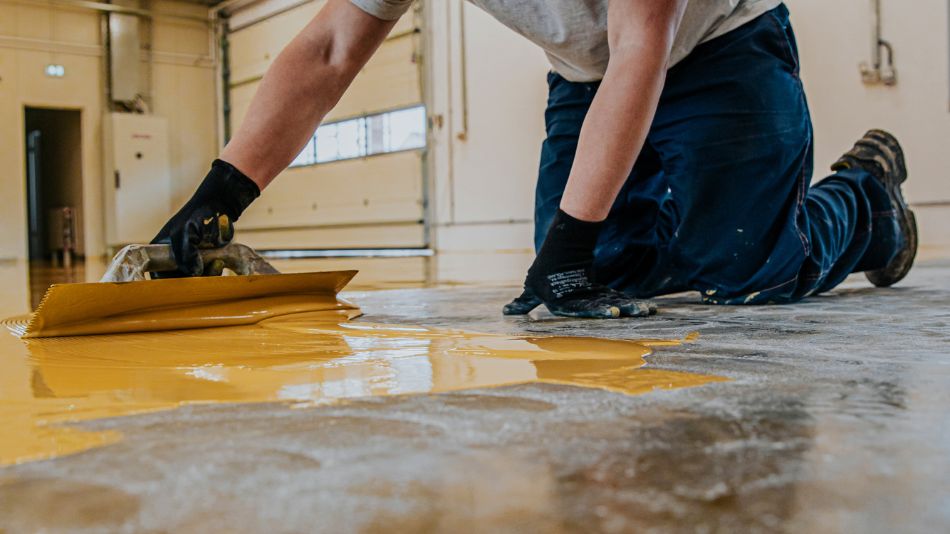
5. Apply the Epoxy Floor Coating
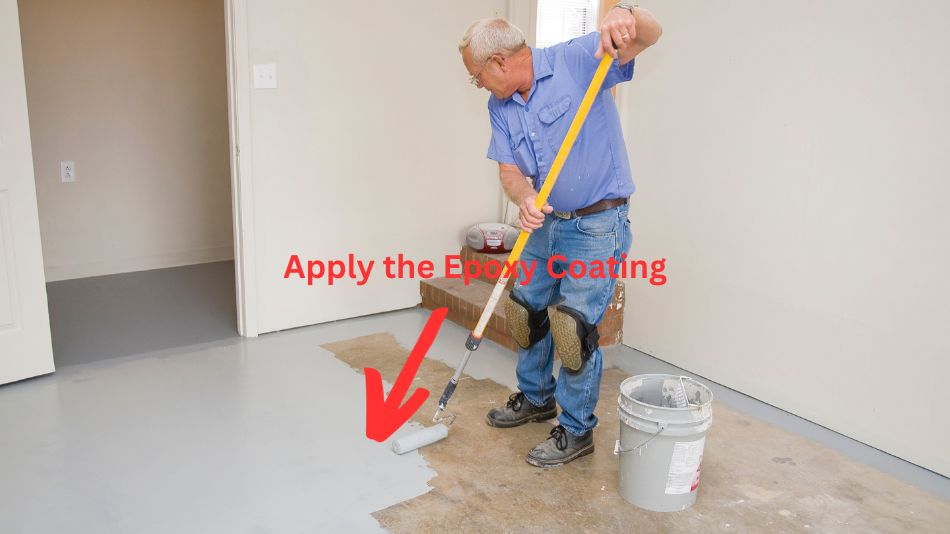
Now that your floor is clean and the patch and repair have had time to dry, it’s time to apply the floor epoxy. For this, I recommend using Rust-oleum Epoxyshield Professional Semi-Gloss Floor Coating Kit.
Side Note: Ensure you have all your tools ready, as the epoxy must be used once mixed.
Here are some basic steps to follow.
- Mix the epoxies separately and then roll part B into part A to break the inner seal and mix the two liquids.
- Next, you must let the epoxy sit for the proper induction time. Follow the directions on the product you are using. Don’t cut open the bag until you’ve met this time limit.
- Cut a corner of the bag and pour the mixed liquid into a paint tray for easy use.
- Do the wall’s perimeter in 4′ by 4′ sections using a small paintbrush.
- Next, use a long-handled paint roller and finish the first 4′ by 4′ section.
- As each 4′ by 4′ section is complete, add the decorative color chips by throwing small handfuls over the area.
- Continue this process, starting in the back of the garage and working your way to the front till the floor is completely done.
- Finally, let it dry for 24 hours
6. Appy the Clear Coat
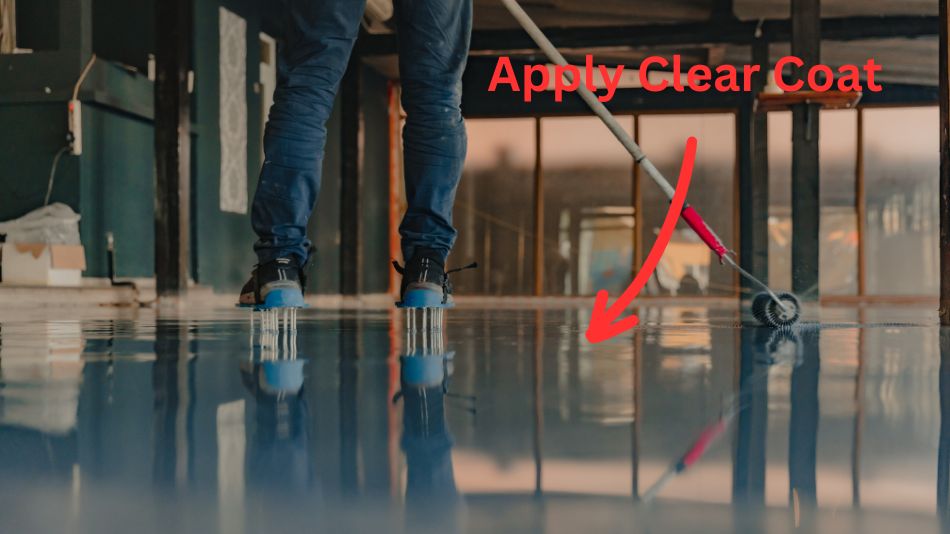
The final step is to apply the clear coat. This Rust-Oleum Clear EpoxyShield Premium Clear Coating is the one I recommend using. Here are some basic steps to help you complete this.
- First, mix the 2-part solution bag separately.
- Lay the bag on the floor and roll part A into part B. This will break the seal in the center of the bag, mixing the solution. Thoroughly mix the solution.
- Cut the corner of the pouch and pour it into a clean bucket.
- Next, add the antiskid additive to the clear coat and mix thoroughly. The antiskid additive creates an antislip floor that will give you more traction when walking on the floor while it’s wet.
- Now dump the mixture into a new paint tray.
- Trim in the edges in 4′ by 4′ sections.
- Use a long-handled roller to apply each section.
- Continue working from the back of the garage to the front until the floor is done.
- Finally, let the floor dry. You can have light foot traffic in 10 hours, heavy foot traffic in 24 hours, vehicles in 3 days, or a complete cure in 7 days.
Does Epoxy Increase Your Home Value
Overall, having a garage floor with an epoxy coating will not drive up your home value, at least not significantly.
Home values typically increase based on the number of bedrooms, the home’s square footage, and location. These things usually drive up the cost.
However, having an epoxy coating on your garage floor may be more likely to impress buyers and help make the sale faster.
Think of it this way: if the garage looks this good, what does the rest of the house look like?
This may pique their interest, drive more curiosity to the buyers, and make the sale faster.
Can You Epoxy Your Garage Floor in the Winter
It is possible to epoxy a garage floor in the winter, but I don’t suggest it. There are going to be a few problems with this.
Floor Temperature
The floor cannot be too cold when applying epoxy to concrete. Typically you don’t want to go any lower than 50 to 55 degrees. Any colder epoxy may not bond correctly to the floor.
The only way you could do this is if your garage is temperature-controlled and you can keep it at a consistent temperature at all times. If you can’t, then wait till you have more favorable weather.
Fumes
The second problem is the fumes the epoxy will give off. These fumes can sometimes be intense, and you should have decent ventilation while doing this.
In most cases, this means you should have the garage doors open. If you live in a colder climate area, you may want to reevaluate this and wait until the temperatures are more favorable.
Are Epoxy Garage Floors Slippery
An epoxy garage floor can be slippery, mainly if you only apply the epoxy and nothing else. This happens because the epoxy will fill in all the cracks and crevices, creating a flat and smooth surface.
There are a couple of ways you can avoid this, though.
Add a Clear Coat. You may want to add the clear coat if you do this yourself. The Rust-Oleum EpoxyShield Premium Clear Coating comes with an antiskid powder that you can mix with the clear coat, giving you more traction, especially when the floor is wet.
Talk to a Professional. Your second option is to talk to a professional and see what they might be able to use as a solution. Often time they may have something similar. or even better.
Should You Paint or Epoxy Your Garage Floor
Painting a floor only covers the surface but does not engrain itself into the surface as the epoxy will.
Over time the paint will wear and flake off since it does not bond to the concrete. Paint won’t strengthen your concrete or prevent cracking like an epoxy will.
What is Better Than Epoxy for Garage Floors
Polycuramine is up to 20x stronger than epoxy and is used for more industrial floors but can also be used on residential garage and shop floors.
The Rust-Oleum Rocksolid Polycuramine Garage Floor Coating is the best option if you plan to go this route.
Where to Buy Garage Floor Epoxy
Below is a list of the products I’ve mentioned in this article from Amazon. I am an affiliate of Amazon, but you can also find these products at many local retailers.
Rock Solid RUST-OLEUM Concentrate Floor Primer – This primer is intended to be used if you already have a previous coating on the floor. This will save costs from having to grind off the previous coating. One gallon will do approximately 400 sq. ft.
Rust-Oleum Concrete Moisture Stop Fortifying Sealer – If your garage floor is sweating or retaining moisture, you want to put this down first after you clean your garage floor. This 1-gallon jug will do 200 square feet of space. This does not come with the floor epoxy kit.
Rust-Oleum Concrete Patch – If your concrete has cracks or chips, this patch will help fill those spots and give a smooth finish. This does not come with the floor epoxy kit. Contains 24 oz.
Rust-Oleum Cleaner and Degreaser – This cleaner/degreaser is used to help get the floor clean. This does not come with the floor epoxy kit, and it is recommended to get the floor clean. This 1-gallon jug will do up to 200 square feet.
Rust-oleum Epoxyshield Professional Semi-Gloss Floor Coating Kit – This is the kit that contains the epoxy and etching solution. This is a 2-gallon kit and will do between 300 and 400 square foot space.
Rust-Oleum Clear EpoxyShield Premium Clear Coating – This clear coat solution will do just that if you want to go the extra step to protect your epoxy-covered floor. This 1-gallon jug will do up to 500 square feet on painted surfaces and 250 square feet on concrete surfaces.
Is It Worth It To Epoxy a Garage Floor
If you’re wondering whether it’s worth it to epoxy your garage floor, the answer is yes.
Epoxy coating is a great way to enhance the appearance and durability of your garage floor. It provides a smooth, glossy finish that’s easy to clean and is resistant to stains, chemicals, and abrasions.
Although it may be more expensive than other garage flooring options, the long-term benefits of epoxy coating make it a worthwhile investment.
It can increase the value of your home, protect the concrete from damage, and create a safer, more comfortable environment for your vehicles and other belongings.
Are you thinking about epoxying your garage floor? Share your thoughts in the comments below.

Our garage renovation project is about to start next year, and I do feel like this is something we can try and invest a lot of money in. Making sure that we get more durable flooring by getting it professionally installed makes quite a lot of sense. If I can find a garage flooring expert in the area, I’ll make sure that I seek their assistance with something like this to make it worth our money.